Translate

Sunday 27 September 2015

Wild autumn bulbs


With the weather cooling off and the season of autumn in the air, I was very keen to replant the wild bulbs that grow on Obachan's plot of land. While I am not a professional bulb grower, I believe these bulbs to be jonquils. Thankfully the wild boars in the area don't like them one bit because the are actually poisonous. 


We've been working a bit on the inside of the old farmhouse, so some beautification on the outside wouldn't go astray and the best part...it's free! So, I had the idea that I could uproot and replant the bulbs along the concrete wall of Oban chan chi's, and then come early spring the little farmhouse would be looking pretty... Nice idea right!


My assistant was keen to help with bulb hunting and planting.


Though in the end, the job came down to me alone and that was fine with me. It was a beautiful warm, Izu day which made it perfect for bulb planting. 


Along the back of Obachan chi's house is the drain and another reminder that autumn is near with higanbana growing wild. 


We'll have to wait and see how our efforts go next February to see if the bulbs like their new home along the fence line. I'll be sure to update you!

Tuesday 22 September 2015

Ghost house no more!


Honestly when we arrived at Obachan's ready to transform this little farmhouse, it was looking a bit ghostly with all the old torn shoji screens.


It would be some time before we could begin to think about replacing the paper. As you know there were more pressing projects to get onto, but sleeping with these screens surrounding us was a little depressing, but our patience has paid off. The shoji screens would have their day!

So first, we used a spray bottle filled with water and drenched the paper to loosen the old glue.


Then the fun part...peeling the old paper slowly away from the frame.


Now the not so fun part, scrubbing the old glue from the wooden frame. Guess how many screens we had to scrub? In total 10!!! After this we were on a bit of an assembly line helping each other to replace the old tape both vertically and horizontally. 
 Yeah, it was time consuming! We pushed ourselves to get the screens done by working into the early hours of the morning. 


We did our research before ordering rolls of shoji paper. What we found is that there are many different types, patterns, durability and of course the price to consider for shoji paper. In the end we opted for a plain white sheet that is plastic is texture, but looks like paper.We also chose the tape, rather than using glue or the new fad of ironing it on. The reason we went for the plastic form is that the genkan gets a lot of traffic in and out of the house and it would also be easier to clean when little creatures ran over it. And lets be honest, this is the countryside and its a very old little house, so dirt and dust is inevitable. 


Once we laid out the paper there was some adjustments to be done, so we simply cut the   excess off. As I said before, we worked on ten shoji screens but this is what we ended up with...looks good right! 


We couldn't be happier with the end result. I personally love the "bones" of the frame to show outwards to the street, but traditionally it is the flat paper that should be shown. Either  way we are loving it! 
Our local onsen has been closed for maintenance for more that a month, but it has since re-opened. Personally, we love our local onsen instead of making the journey to the next town. So, after all the scrubbing of old glue from the frames, peeling of old smelly paper and endless taping its time for another onsen!


Sunday 13 September 2015

A place to just be......

The engawa in my opinion is a special place in a traditional Japanese house that you can sit  with a cup of tea, take in the view and just be....

Japanese traditional style SAMURAI house:
Source: TANAKA Juuyoh (田中十洋)
Japanese traditional style SAMURAI house / 稲葉家下屋敷(いなばけ しもやしき)

Once we finished the toilet area that leads off the engawa, I knew it was the next project I wanted to tackle. So ready with the orbital sander I got to work and removed the layers of old stain.  


What all that sanding revealed was light coloured floor boards. 


Even at this stage the area was feeling fresh, but there were holes that needed filling with some putty and impatiently I had to wait 24 hours until it was completely dry before I could paint.  


You know painting is my thing and I was just so keen to get some varnish on these boards! But my assistant was even more so.....


After one coat of varnish


Love this when the wood meets tatami!


Ta da! Now after two coats of varnish


Our little engawa has been given some love and now we can enjoy sitting together with a cup of green tea and just be..... 


Sunday 6 September 2015

A little place to sit

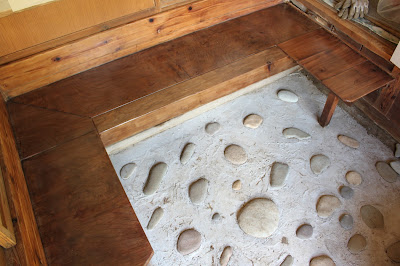
I have been wanting to sand and varnish the agarikamachi-seating platform ever since  we concreted the floor. This little seating area has been crying out for some TLC. 
Our sweet toy poodle "Bikky"
So firstly we started by sanding this area by hand since we had a couple of sheets handy, but that idea got old real fast, so I switched to my new best friend....my orbital sander! Then it was just a matter of wiping it down with a wet cloth to prepare it for varnishing. 


I used the same clear varnish as I did on the toilet bench, so that it would expose the natural wood grain. However I'll be honest and say that I just wasn't happy with the end result, it just looked so flat. So back to the hardware store for a tinted varnish with a gloss sheen to it.

BEFORE

Here is my ever enthusiastic assistant, eager to paint alongside me again.


AFTER

The timber itself isn't of any fine grade, just a humble little place to sit as you enter and exit with your shoes. Japanese style!


But we are happy with the varnish and how it turned out in the end. It really is about trial and error! The process was a lot of fun though.


But I need to close this door now and head out for another onsen!